Vue.Js is a progressive Javascript framework by Evan You with its initial release in February 2014. It is used for building user interfaces and single-page applications. A vue project can be set up directly from the vue-cli. To use the vue-cli, you have to install it into your machine globally by running the command.
npm install -g vue-cli
Have in mind you must have installed node.js into your machine to use npm (node package manager). The above command will install vue-cli globally (-g does the trick). To create your actual application, open up your terminal and follow these steps.
Vue create project-name

This command creates a folder with basic templates into a folder project-name (you can put in whatever name you want to use). It pulls a webpack template, prompts for some information and generate a project in directory/folder new-project This will also prompt you to pick a preset, you either choose the default preset for the manual preset. If you choose the default preset, your project is created with the vue.js default settings, but if you choose to customize your app the way you want it, you will go for the manual setup option.
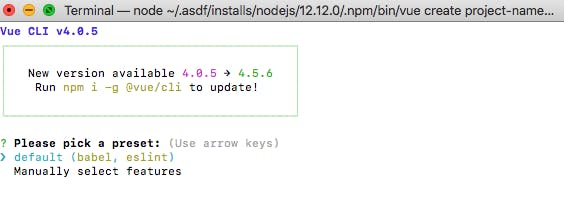
The options you get allows you to choose which of the vue.js features you will want in your app. Use the arrow keys to navigate between options and use the spacebar key to select options. At this point if you are satisfied with the options you have chosen. Hit the enter key.
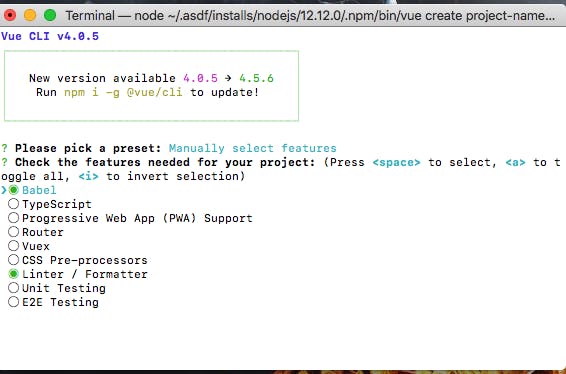
You can choose to use history mode for the router (i’ll avoid you use history mode with Y) If you don’t choose an option between y/n it defaults to Y. Place you babel, eslint etc. in dedicated config files.
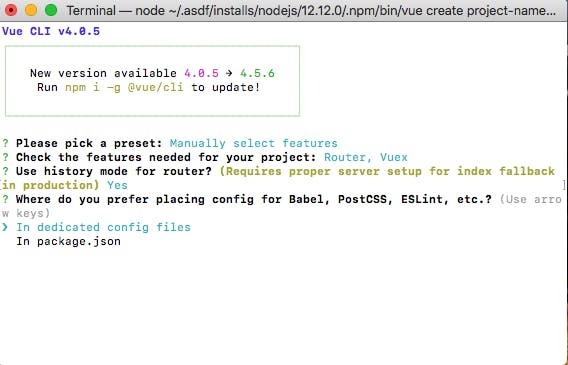
You can choose to save the presets for future projects. After you’ve satisfied your options, you hit enter and your projects is being set up by the vue-cli
Change directory to your project folder
npm run serve to serve your project locally
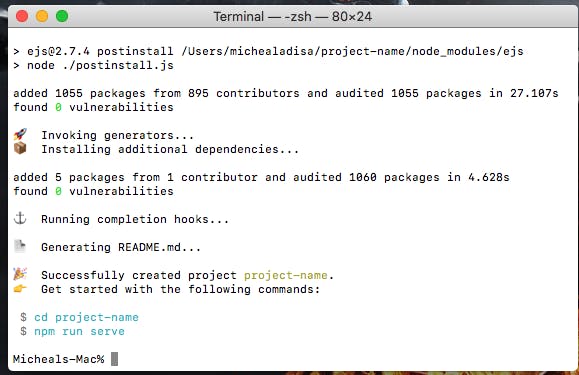
Tada!!! You are up and running. PS: You can as well checkout Vue.Js documentation here .

